Race Ware Direct GoPro Garmin Mount Review.

RaceWare Custom Components....................... interesting !

 3D Printed Custom Cycle Components, RaceWare produce a variety of 3D printed items, made from both nylon & Titanium as well as offering a full custom service. All in the UK! bike mounts  are just a sample of some of the interesting items they produce, ie: Cateye, Garmin etc.

                                                      Cateye Cycle computer mount
                                                            Photograph by A.Burns


3D printing or additive manufacturing is a process of making three dimensional solid objects from a digital file. The creation of a 3D printed object is achieved using an additive processes. In an additive process an object is created by laying down successive layers of material until the entire object is created. Each of these layers can be seen as a thinly sliced horizontal cross-section of the eventual object. I can remember seeing this on Tomorrows World years ago! and it has now arrived to the masses!

Now you get the idea of what they do, RaceWare quote on their website they can customize any item they produce, sounds good to me! for example words and colours etc, here is the link, see what they can do for your next mount, http://www.racewaredirect.co/customise/ 


Have a look at their Gallery on there website for some ideas
 http://www.racewaredirect.co/gallery/

                                                        Cateye and Garmin Mounts
                                                              Photograph by A.Burns
                                                      Photograph by A.Burns

We have for test and review, two from their many ranges of bike mounting clamp's, we chose the Garmin, and the Cateye, as there are a lot of Garmin users riding bikes up and down the country, and also Cateye are a leading brand of lights, fitted to many bike's.(Totally forgot that Cateye also produce Cycle computers, we will tell you how we get on as the mount we have is not for a light)

A colour chart as standard, they offer 11 standard colours which are: Black, Red, Pink, Blue, Yellow, Green, Orange, Purple, Neon Yellow, Neon Orange and Neon Pink.

A bit about RaceWare, just read this great link to how they came about
http://www.racewaredirect.co/about-us/


                                          Here is one fitted to the bars on a road bike

            As you can see, it now puts the Garmin out in front where it becomes more visible
                                                             Photograph by A.Burns
                                                                Photograph by A.Burns

It easy to fit with a Hex key fitting, that is in every cyclists tool bag, has a nice rubber gripper in the inner ring that stops it from moving and has a lot of grip.


Verdict

If you have a Garmin fitted to your header bar or handle bars, then check out RaceWare for that something different to have on your bike, it holds the Garmin nice and solid, and makes it a practical accessory.
A worth while addition, it will also allow for other kinds of mounts on your bars as well, look them up they are on Facebook

Facebook  https://www.facebook.com/pages/RaceWare-Direct/283022258435575

Twitter feed @racewaredirect

Main Website http://www.racewaredirect.co/

Don't forget you can have your club or team name on the side, so ask them for details.

RaceWareDirect are also looking to add to there stockists in case there are any Cycling shops interested, if so, drop them a line


                                                  GO-PRO Mount
I Have used the GO-PRO Mount on a KitvisionUK Blast camera, just to show you how versatile RaceWare mounts are
                                 GoPro Mounted to a Camera Cyclist handle bars
                                           GoPro mounted to RaceWare mount

What better way than to let a camera cyclist mount there GoPro to a RaceWare mount, this is subject to change bikes, as the one above is not the usual bike used by Dave Sherry of Harlow.
This will be a real test, the camera is used every day to record cycling road safety videos on his way to and from work,

 Great Value, Great Design from Race Ware.


UPDATE 

 Tried the Raceware on the Specalized MTB out on the trails and it works a treat! 

So well designed to be out in front at the right angle, holds the Garmin a 100% over the rough ground, not once do I need to adjust or check the Garmin, it stayed where it was placed.

Can not recommend the Race Ware range enough, look out for there updates on there Twitter and Facebook page, if you need something made, drop them a line.

Here are a few other mounts and grips that Race Ware Direct manufacture.
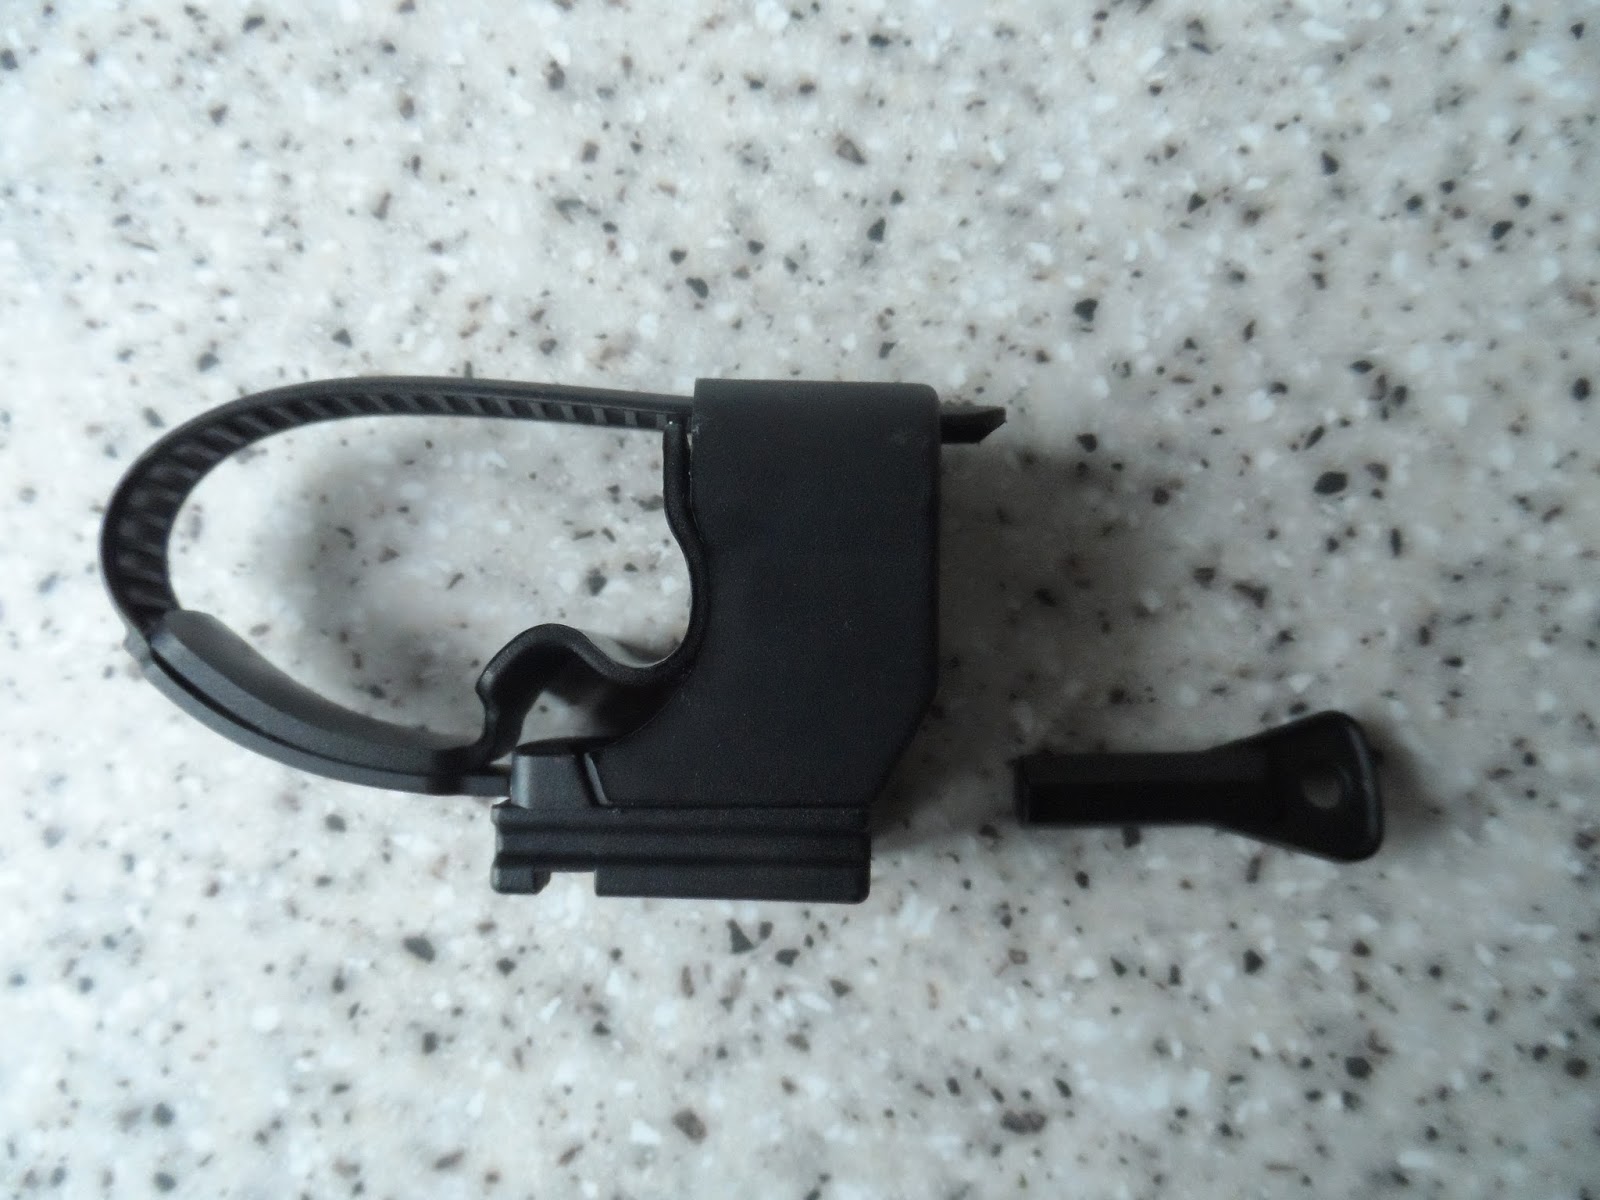
GoPro/Garmin Mount.
 Name of your cycling club can be printed on any mount.

 GoPro Mount.

The Mount fitted to the bars.
Holds the Garmin firm out in front, and the GoPro nicely positioned out in front.

New to Race Ware Direct Silicone Grips.


Foot Note This is not a Paid Advertisement for Raceware Direct

Hornit Horn Review

A Look at the Hornit, a horn with a difference.

The Hornit, great packaging, well designed, I really like the way the lads at Hornit has spent time on the packaging 


The Hornit attaches to your handle bars vie a mount with a cateye type bracket, take a  second look it appears to use a slightly different tightening mechanism which is an improvement. It tightens via a hex key which appears to be very solid and the rubber grip of the strap allows the bracket to hold well on both road and any other handle bars

Bracket for the mount, and the Hex key


So whats in the Box, and what a great thought out design of a box it is, I liked the way the horn was displayed in side, you can see how much thought went into the design of the packaging.


1 X  Instruction sheet
1 X  Hex Key
1 X  Hornit horn
1 X  Micro switch
1 X  Connector wire
1  X Battery's
1 x Note reminder   

First thing to do was fit the battery's as directed in the very well thought out instructions leaflet, a simple case of a small screw, and you had access to the battery compartment on the horn.
What we then needed was to now fit to the bike!
I removed the old bell fitted, gave the handle bars a little clean up, and offered the horn up to see where it would sit, I decided on the left side of my bars.

Hornit being offers up into position.

I made sure it was not to far from the Micro switch, and then fitted the Mount, a nice bit of rubber held it in place to stop it from slipping, and tightened the clamp with the hex key.
Next thing was to fit the micro switch in place where it was close to pres, at first, I fitted it passed the hand grip, Then wound the wire round the handle bars to take up the slack, and connected the plug,  this was pushed all the way in as recommend on a slip of paper that was in the box, a quick test with a push of the button, and hey presto! One Loud Horn! and I do mean Loud!
It has 2 settings, a loud trill, and a slightly lower piercing sound, more suitable to cycle paths to warn pedestrians that you are approaching, the two tones are very easily changed by a little button on the back of the horn, press it and it changes tone.

I Took it out for a test ride, and it wasn't long before I had to use it in anger! Cars now know you are there, a car went to pull out, not too sure if he saw me, but a quick blast on the Hornit and he knew I was there!
Same with pedestrians, they walk along aimlessly on your part of the cycle track, a press on the Hornit and they turn around!
Found it brilliant when approaching a T crossing on a cycle path, a blast to warn other, and safe to proceed.

So, fits great on a straight bar bike, but how about a road bike!
A look on the instruction sheet on how to fir to road bars, and off I went to try.

First off, find the place it will sit on the handle bars, remove the old bell, place the Micro switch where your finger can press it easily, I found the right hand was more comfortable.

Micro switch fitted to the hood

I then checked on the length of cable from switch to the horn, I found I had more than enough, so, I mounted the clamp and tightened it with the hex key.

Now comes the bit some might not be too comfortable on doing, if this is the case, take your road bike to your nearest local bike shop for them to do it, as you will need to unwrap the part of the bar tape to cover the wire, so, find the end of the bar tape, and start to unwind the tape.

 Find the start
 Unravel the bar tape

 Place the wire on the handle bars and rewind bar tape tight
 Seal up the end of the tape again to stop it coming unwrapped
 Hornit in place
Micro switch
End result!

This only took about 15 minutes to do, it is that simple to fit the Hornit.

On a social ride on Sunday, it was shown to other cyclists, and in the words of Sam Snelling, who I can Quote, "Thats Amazing, well impressed".

The Summing Up!

Don't leave home with out one! 
Until you have one fitted, you wont realise just how easy it is to let other road users and pedestrians know you are there, a quick press of the button, a loud sound is omitted, and you get noticed, as simple as that, if you only have one horn, make it the Hornit, top quality, great service from the people at Hornit.

Simply a Must have product, highly reckoned this horn to every cyclist out there! .


UPDATE


Since fitting the Hornit to the Road bike, I had full use of it on the London to Brighton Bike ride on Sunday the 15th June, came in so useful as there were a lot of cyclists not keeping to the left!
And also it was great fun blasting away on it when the children were  standing with mum and dad all cheering us on and wanting all the passing cyclist to ring there bells, you can imagine there delight to hear the Hornit!

Fantastic horn, cant wait to get out there again and blast away! 

The Hornit on the London To Brighton Bike Ride 15th June 2014

Some Video Links to the Hornit Horn

 Critical Mass Ride in August Filmed with the Blast 


Here is one for the Younger riders out there!
Xmas is coming up soon!

https://www.youtube.com/watch?v=mCNokPNQSnI#t=48

Check them out at Lee Vally Cycles at The Stow in Harlow

http://www.leevalleycycles.co.uk/

From a cyclist out there...
"These guys are the nuts, product is fantastic, and the customer service is second to none. Never known service like it. Cheers guys!"


Foot Note This is not a Paid Advertisement for The Hornit 

I'm not much good at this Blog stuff, and if you have had the chance to read any of my so called Blogg's, you will probably agree with that statement!

But I came across a Product that has all been used by a lot of Builder's, DIY'S as well, Its Silicon Sealant!

Ahh, you might say, but I came across a New Type of Silicon Sealant, (well it is for me), this one is a little bit different, as it has different type of manufacturing process, now as I say I'm no professional on this subject, so will have to leave that to the technical Bod's and the sales Lady! or Man!

Bathroom Silicon will have the usual Anti-Fungicidal in it to prevent Black mould building up on it, so it should stay whiter for much longer, than one with out, in this product I'm going to tell you about it has Triclossan which is a powerful Anti-Fungal and Anti Bacterial agent, as stated on the Web-site, haven't got a clue what that is, but it's better than the old ingredient that go-into a Tube of Silicon, and sounds very impressive!

OK, if your still here I'll put you out your misery and tell you what it's called and by who,......

It's Made by a Company Called Silicon Master's, Who, I hear you say!
To save me writing a lot of stuff on who they are, check them out here....

http://www.siliconemasters.co.uk/
   
They also on Face Book as well, and Twitter! so, they know the importance of Net working a Product, any way, I'm getting carried away a bit here........

Back to the story here!

I remembered I was going to reseal around the Mother-In-Law's Bath, as I had not long a go replaced her electric shower for one that works! and noticed the state of the Bath seal, now, I for one know who important it is to have a really good seal around your bath and around the shower area, it was @juliesilicon that reminded me, we got chatting, she said have I used her silicon, and I had to admit I never herd of them before! (sorry) 

Well she got right into the power of her Silicon, and must admit was impressed  I went out to our local Trade centre and they had never heard of the stuff! , so back on to Twitter to tell Julie we don't have it down here, to be told the area is not covered yet! not to worry she says, ill drop one in the Post!

She did,as she said she would it arrived! 

And here it is! 
First thought was, "I's a Tube of Silicon"!
Straight away, i pulled the Nozzle off, and screwed it on the tube, and broke it! I know, I should have read the instruction's first before I mucked about with iy, it wasn't as bad as it sounds, I just broke a little tab that holds the Ex-tenable, Yes, I said Ex-tenable Nozzle in place! 

Off to the Mother-In-Law's!


And this is where I now realise i cant add a Video of before and after! so its off to You Tube

If this works.....

The Before video is here 

http://youtu.be/rZSHVfLwN0s

And the video of the area prepared is here

http://youtu.be/n-yIzj6LO7M

And one of the Bathroom sink and window is here all before


http://youtu.be/lH5bSJCzjzo

And the Finished video is here

 http://youtu.be/DlN5V8JOiJk


Here you can see the Ex tenable Nozzle in use!

The Best thing I like about this Silicon, is when you stop the trigger of the gun, the silicon stops as well, unlike any other Silicon I've used, where it keeps coming out the gun!  

Smoothing off is as simple as it gets! so easy to work with, and no nasty smells either, it goes off quicker as well, we had the curtains back up in place after a hour!  

Marks out of 10, Ill give it a 10 any day! the quicker this come's to our local Trade center the better! 

So Thank you @juiesilicone for the experience of using such a great product!


Raleigh Tyre Leavers

Every cyclist needs a set of tyre leavers in there kit bag, there are some cheap and nasty ones out there, and there are some good quality ones, a name that jumped out at us was the famous bike name of Raleigh Bikes UK

http://www.raleigh.co.uk/

There tyre leaver's have a great description on them, and that is "Made In England" ! I liked that, nice to see the name of Raleigh  from Nottingham still in the Game!

                                                    A Set of Three tyre leavers
                                                                Raleigh
                                                             Nice packet
                  The three leavers with a interconnecting slot to hold them all in place
                                           Nice soft slot to hold to the spokes
                    Smooth rounded corners to prevent damage to your wheels and tyres

 Cheap set just broke under presure on a hard side wall bike tyre


There are Tyre Levers, and there are tyre levers! 
The Raleigh Tyre Levers stood up to the test, the other cheap set just gave up at the Tip!

Make sure the Tyre Levers you have are a Good quality set.


Ideal Xmas Stocking Filler for any age.

See your local bike shop.


tooocycling TOOO Cycling™ DVR80 Model Bicycle Lamp Camera

TOOO Cycling™ DVR80 Model Bicycle Lamp Camera https://www.tooocycling.store/products/tooo-cycling%E2%84%A2-dvr90-model-bicycle-lamp-camera-f...