UPDATES WILL BE AT THE BOTTOM OF REVIEW.
Stans No Tubes Review
Price around £18.00 for a 32 oz Bottle but shop around, various price and size available.

On my Gravel bike it was time for a top up of sealant, so I needed a decent sealant to top with, and this is how I came about to test out the Stans No Tubes sealant.
If you have not thought about going tubeless it could be a minefield, I just so happen to get hold of a bike that already had a tubeless setup, so it was a easy choice!
Every few months the system needed a top up, and this is how I come about using the Stans system, I never had a puncture with the original sealant that was in the bike wheels from new, but I wanted a reasonable priced sealant, and just so happen to come across the Stans range of sealant,
Next step.
 |
| Open the lid and remove cap. |
 |
| Peel back the seal and replace the cap close the lid and give it a good shake. |
 |
| Replace Cap. |
 |
| Find a 2 oz container with a thin nozzle.. |
 |
| Remove the black cap on the valve and release all the air out of the tyre. |
 |
| Remove the valve, you may need a valve removal tool for this. |

 |
| Fill your small bottle with Stans and shake pour into the valve. |

 |
| Carfull not to slip off the valve. |

 |
| Give the bottle a squeeze. |
 |
| Once the refill bottle is empty refit the valve. |
 |
| Wipe any excess fluid of that might have been spilt. |
 |
| Pump up the tyre to the required pressure as recommend on the tyre. |


 |
| Replace cap and spin the wheel to get the sealant to flow around the tyre. |
My Verdict.
Easy enough to add to a existing tyre, I will let you all know how I get on..
Date of Application 15/06/2019 will keep you informed by social media on how well the wheels perform, I ride anywhere, road, woods, gravel, you name, I go there, so ill let you know if it lets me down!
UPDATE
I had a puncture on the rear tyre, handy as Im doing a review on the Stan's Sealant....
How well did the Stan's work, very well on a small hole, take a look at the Video of the tyre.
Not long after the reseal of the tyre, I set off to ride into London vie the Towpath and return vie the road, and all was well.....
It works a treat, well recommended..
Update 16/07/2020.
Have noticed a few time when getting the bike out to go for a ride there is a lot of Bubbles appeared on the side wall of the rear tyre, I’ll try to find out what this means..

Stans Website....... https://www.notubes.com/
Twitter Feed.......... https://twitter.com/NoTubes
Facebook Feed...... https://www.facebook.com/StansNoTubes/
Instagram Feed...... https://www.instagram.com/stansnotubes/
UPDATE 01/04/2021
It was time to top up the wheels with Stans tyre sealant, Stans recommend every 3 months, and as I was well over the date and with the weather going to improve along with lockdown rules changing it was the time to add some more sealant.
That was the plan, but the day before I pumped up the tyres before I went out for a ride with the plan to add the sealant the next day, but after the next day I found the tyre was flat on the front wheel, not soft, but totally flat, this was down to my mistake of not retightening the valve, the tyre was off the rim as well, which means I needed to reseat the tyre on the rim, earlier on in my review I mentioned the Pressure Sprayer which I came across on YouTube, and this was the ideal opportunity to test out if it was possible to pump up a tyre to get it to reseal on a rim.
Try this YouTube link to find out how to convert your pressure sprayer.
Here is a photo of my one which I converted, and after use, simply converted it back.

I had to try it a couple of times because I did not fill the container with enough air to make it pop on the rim, I did notice though the Pop sound was not as loud as when I was in the Stow Tyres getting the Panaracer on the rim, but this does work.
Next refill should be in 3 months time, but I have come to the end of the bottle of Stans, so will be looking at other products on the market, but I think the Stans does a brilliant job, not a single problem on any of my rides, well recommend product.
UPDATE 24/04/2021
UPDATE 24/04/2021
On a ride out to meet up with the organiser of the London Gravel Cycling Club, Agris, We had a chat about the world of Gravel Riding, on the way home I felt the softness in the rear wheel, and after a quick stop I decided to pump up the tyre, Stans had done a good job of stopping the “P” word..... and all I had to do,was put a bit more air back in the Panaracer Gravelkings rear wheel, easy, or you would think it was...
I went to pump up the tyre and noticed the pump was not coming off the valve easy, I had a bit of a struggle but eventually it came off, only to notice the reason way I was struggling to remove the pump, the valve had broke!. I managed to get the valve to work and put some more air in, only to find when setting off the tyre was too soft to ride on, I let more air out than I put in, .... a quick phone call to my lad Dee, for a recovery ride home.... Appreciate it loads thanks for the rescue, so the Bike and I set off home to explore the reason why it had broke.
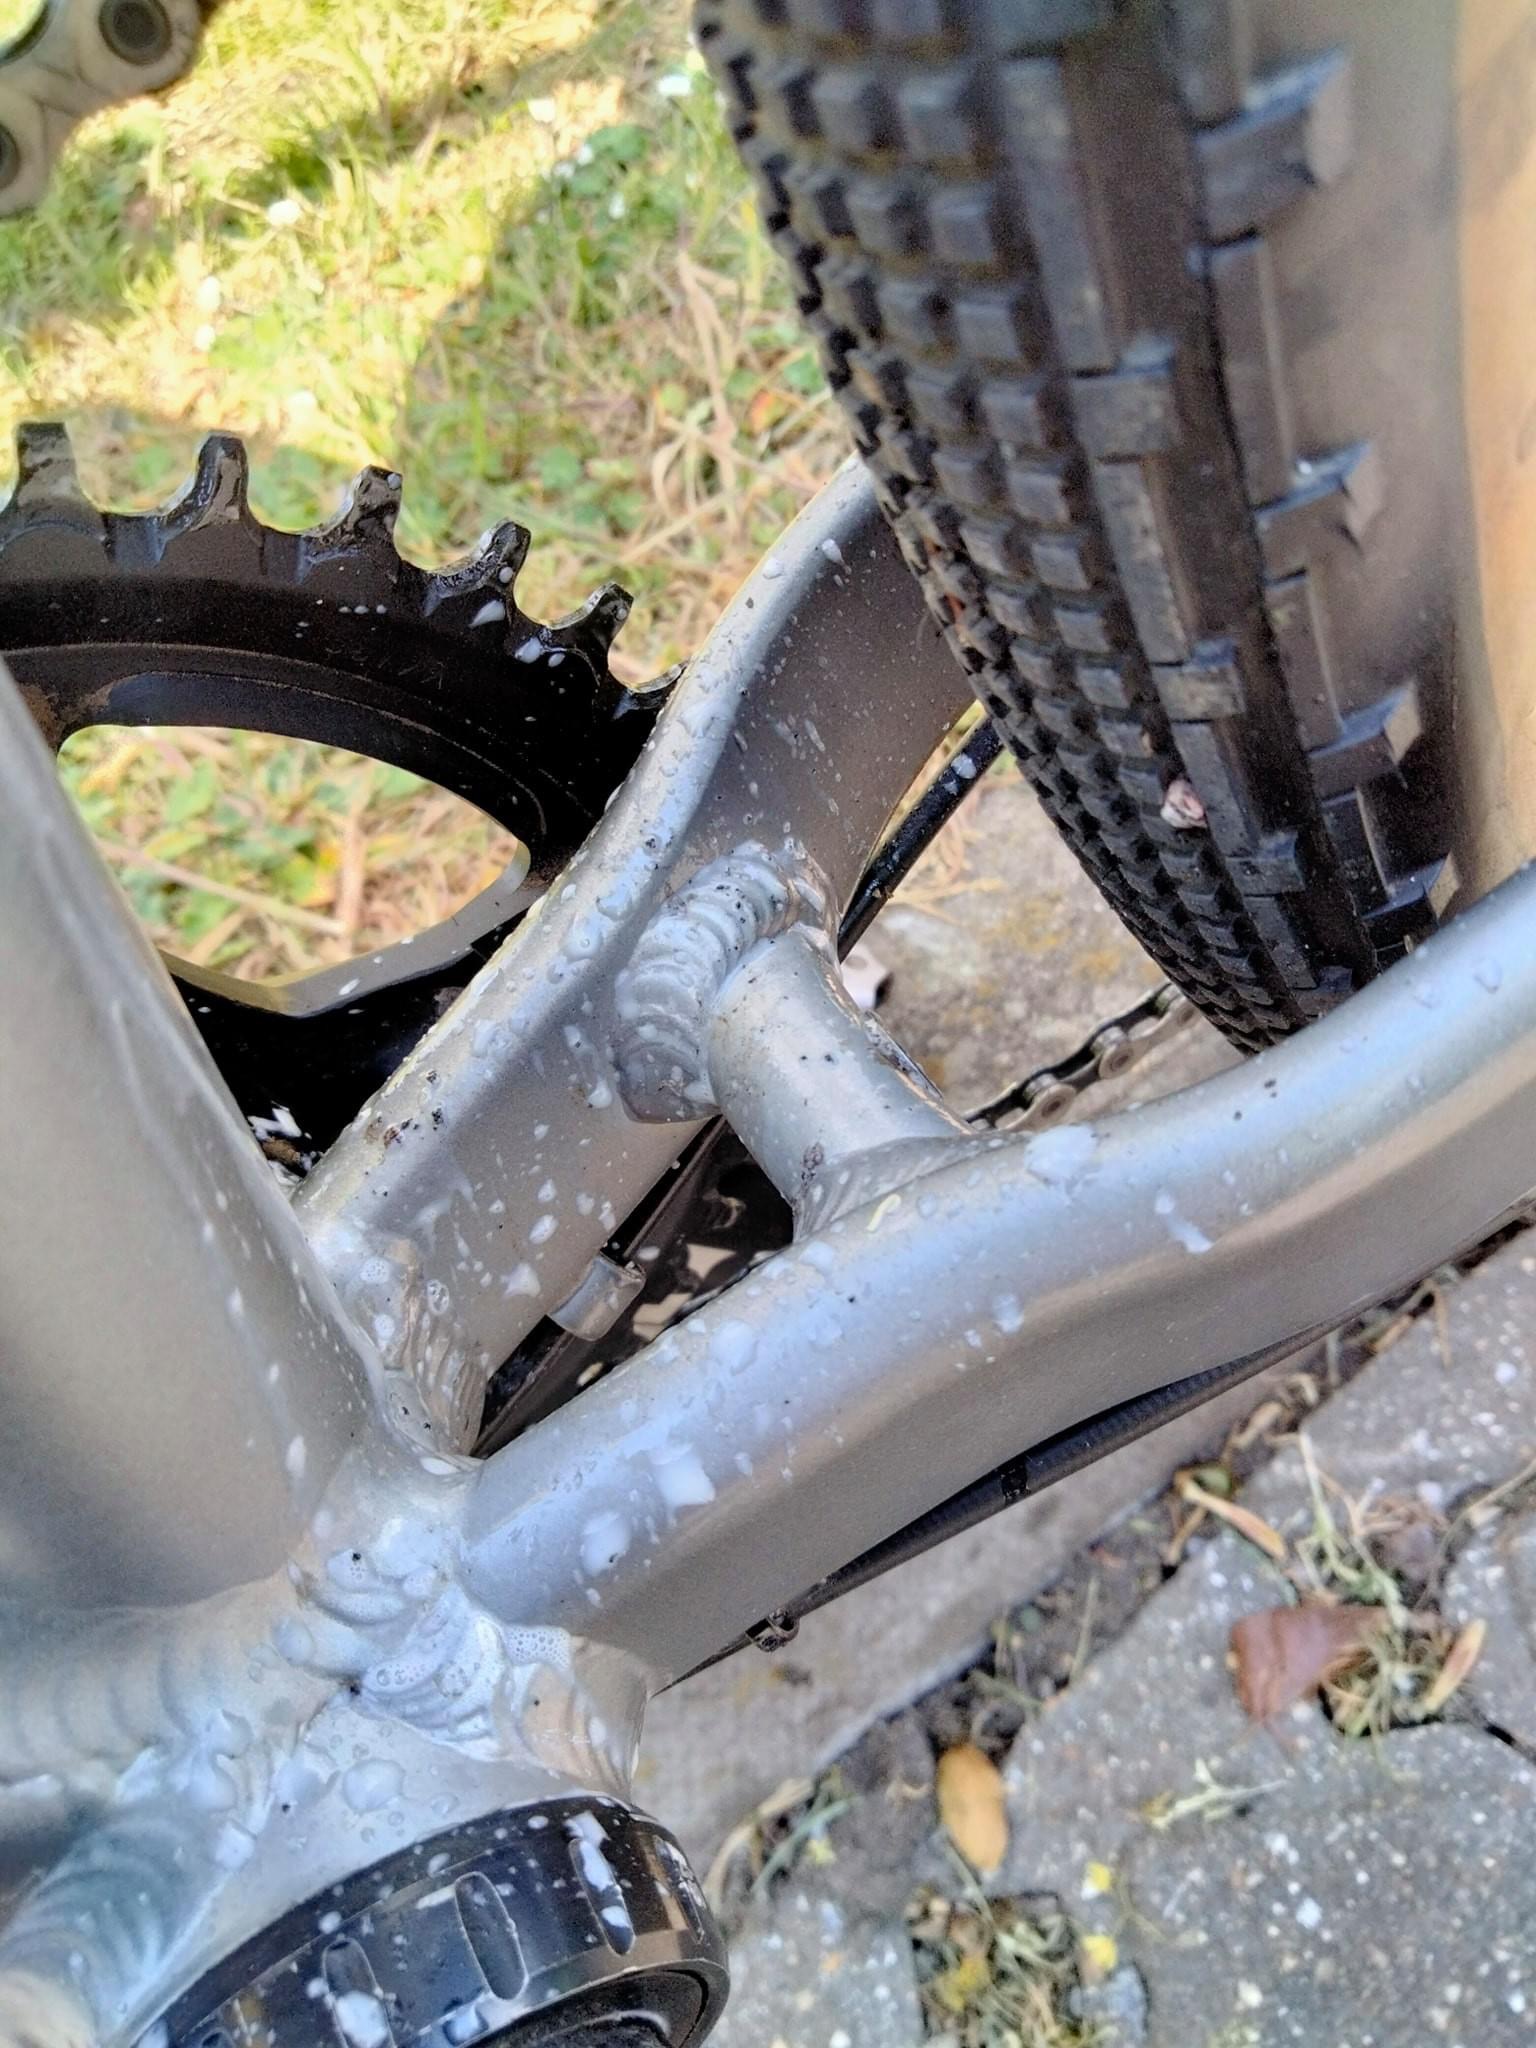
One home it was clear to see the Stans had declared a War on the side wall of the tyre and wanted to do its job and reseal the tyre vie the side wall! I managed to remove the broken valve, and on removing the tyre noticed it all needed to be cleaned up before even thinking about putting the tyre back on the rim!
It took me a good part of the day scraping off the Stans, I tried White Sprit, Degreaser, Ducksmart, all to no real success apart from sitting there with tyre and scrapping off every bit of excess Stans Sealant! The Down Side Of Running Tubeless I Guess!
All I need to do is carry on and check the side wall of the tyre, find a replacement valve, our Local Bike Shop Lea Vally Cycles in The Stow should be able to help, and then refitting of the tyre ...
UPDATE 26/04/2021
A visit to the Local Bike Shop Lee Valley Cycles for the Valve as a replacement to the one I broke, nice having a chat with Dave the Owner, after it was back home to replace the GravelKing tyre, I must admit it took me ages to clean it up, but Finally completed the whole tyre so it was good enough to refit to the rim.

A video of the side wall with the Sealant still in place and removed.
To get the Gravelking back on the rim and pumped,up,with air I decided to try the Hand Sprayer again, it worked last time, so this was another ideal opportunity to get it out and try it again, seems a easy solution, but after I converted the sprayer and tried it I got a bit fed up with the hand pumping,,and decided to pop back to my local bike shop Lee Valley Cycles, that’s the one in the Stow, just by Dorringtons the bakers, on arrival and asking what Dave used to put air in the tyres he quickly grabbed the wheel and connected it to the compressor, with a quick press of the trigger on the tyre gauge and a “Loud Pop” was echoing around the shop which meant the tyre was back on the rim, so a quick dash home to add the Stans back into the Panaracer Gravelking tyre, I put the valve back in the stem and pumped more air in the tyre l checked the -reassure and replaced the cap, on checking the tyre I noticed a bit of Stans ozzing out, no problem as I knew the Sealant would work and seal the small hole.
After a while I rechecked the tyre for the air pressure, and as the wheel was still up, I refitted it to my bike...
Job Done..
Update 101/-5/2021
Being a Saturday morning I was looking forward to a meet up with the local Hub and Spoke crew for a ride out, meeting time 10.00am, at the Harlow Museum, various rides head off so feel free to join us now we can get out more... (plug over)
On arrival I noticed the White all over the frame of the Gravel Bike, and a quick check I noticed a lot of Stans sealant all over the frame and was oozing from a very small hole, size of a needle, I cleaned up the frame and tried to get the Panarcer Gravelking to seal up, added a bit more air as it was very low now, for some reason the Stans will not seal the minute hole, very annoying as I was looking forward to a nice coffee and a nice coffee, so decided to return home to find out why...

.... I will see how it goes for a while, hopefully it will seal, I don’t really want to remove the tyre and put a patch on the inside, or use a plug, seems a bit disastrous... I’ll let you know...
Thanks for for the follow, any questions feel free to ask...
Update on the Update.....
Finally it sealed, it took over 3 hours, so fingers crossed, I’ll leave it overnight and check it out tomorrow sometime..
UPDATE 03/05/2021
I was planning on a ride to meet up with the London Gravel Cycling Club at the Mayfield Bakery in Harlow, a ideal opportunity to sit and discuss over a coffee some gravel bike news etc, BUT it was not to be for me, I was heading out to meet up in the confidence that my tyre was sealed at last, only to find out after I set my Meilian to the route I was going to take my tyre had gone down!
:
, |
| Flat again! |
I knew there was no point in even thinking of using the pump, so I returned home to explore why it had decided to go flat again..
On my return I removed the wheel and decided that enough was enough of the Stans tyre sealant, it obviously has run its course and I’ve used up all my life’s on running a tubless system with the Stans, but this time I had learnt from my last mistake, I removed the tyre from the rim and gave Brove a real good clean up ready for my next Product Review on a tubeless system, I think the Stans is a very good product when first installed, maybe I had just reseated the tyres too many times, ill be looking for a New product to try, maybe Muckoff or I like the look of the Peatys sealant, I’ll be looking into it further, hopefully will be doing a new review blog soon, one product that caught my eye for a “Get Out Of Jail” card would be a visit to the Wilco store, they have a small Sealant that would get you out of trouble if ever you needed it and no local bike shops are around or open..
Thank you to Stans for giving me the opportunity to do a review on your Tubeless Tyre Sealant.
 |
| I learnt my lesson the hard way, last time took me two days to clean up wheel and tyre, this time, as soon as I was home, it was off with the wheel and the tyre and a real good clean up! |
 |
| STANS REMOVED |

 |
| I made good use of my bench work stand from BDBikes (see my review) |
 |
| I CLEANED IT ALL! |
.
THANK YOU FOR YOUR TIME..
Please Feel Free to Support Our Sponsors Adverts. Thank You.
Foot Note This is not a Paid Advertisement for Stans No Tubes.
Harlow cycle page on Facebook: https://en-gb.facebook.com/Harlowcyclepage/ l
YouTube: https://www.youtube.com/channel/UCBlXmH7f4X0Az_xr7Az0Yqg
Instgram: https://www.instagram.com/harlowcycle/
Tumbler : http://harlowcycle.tumblr.com/
Twitter Feed: @TDF79
Linkedin: https://www.linkedin.com/in/harlow-cycling-b785a1105/
Pinterest: https://www.pinterest.co.uk/Harlowcycle/pins/
Email: HarlowCyclingPageGroup@Hotmail.com

No comments:
Post a Comment
Please do leave a comment