Review
Gravelking SK Gravel Bike Tyres.
My review for you all this week is on a Pair of Gravel bike tyres for your gravel bike from Panaracer bike tyre manufacturer. (I Love the word Bike) ...
Called Gravelking SK and they are Priced around £30.00 per tyre, Prices can vary, Zyrofisher are the distribution company in the UK .
Who are Panaracer?
I found the following information about the company on there website, a very informative site full of information on how the company was first set up.
I found the following information about the company on there website, a very informative site full of information on how the company was first set up.
Panaracer develops every tyre in Japan and produces over ninety percent of the tires they sell in there own factory in Japan, Feedback from there partners all over the world flow to them and are combined with fine Japanese craftsmanship to insure there factory continues to make the tyres we all want, there full time staff of engineers and R&D people are always thinking of new ways to blend tire making materials into top legal bicycle tires. That is the information on there website, you can also find a great video on the site as well as many other informative news.
Gravelkings SK Gravel Bike tyres size 700x43 (43-6220)
Available in other sizes.
Made in Japan.

Panaracer have packaged the Gravelking in a card neatly folded and bound with a band, I must just say it works well, if you have a shop it will be a easy product to display on your shelve racking display hooking system.
Made in Japan, in there own factory, apparently Panaracer have been around for a very long time since 1952 where they began manufacturing rubber products for commercial and consumer applications, since that time Panaracer have been manufacturing bicycle tyres, and nothing else, so the full focus of Panaracer is bicycle tyres manufacturing, according to the information on the Panaracer website they are the last Japanese manufacturer still producing bicycle tyres in Japan..

(Permission to use photo from Panaracer)

Gravelking tyre size 700x43C (43-622) various sizes available.
700Cx 32mm
700Cx 35mm
700Cx 38mm
700Cx 43mm
700Cx 32mm
700Cx 35mm
700Cx 38mm
700Cx 43mm

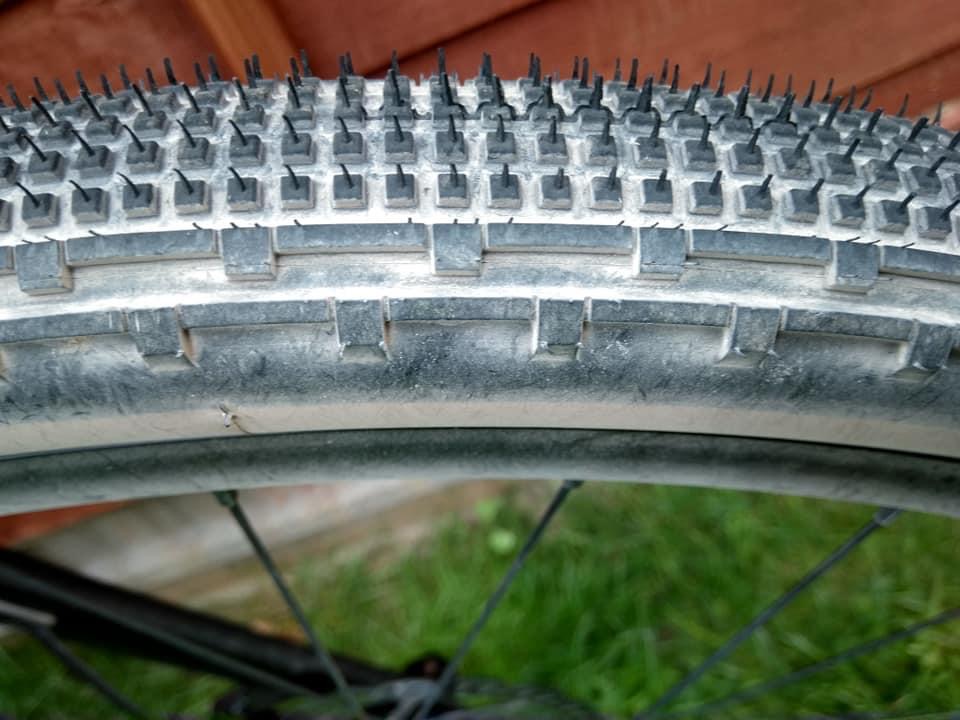
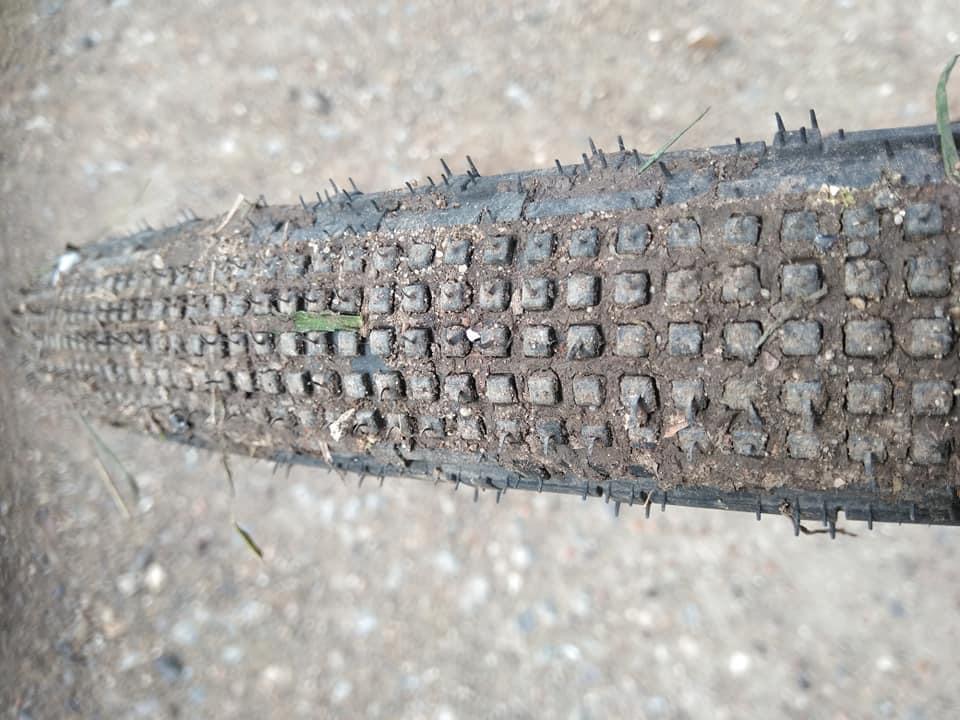
Tread pattern, this was the first thing that caught my eye, the square knobs are mainly to the centre of the tyre, These are consisting of A small equal spaced out pattern along the centre width, and it has a broken line similar to the Dot Dash line out on the outer edge making for plenty grip when the tyre needs it.
 |
| Anti-puncture reinforcement throughout the tyre strengthens resistance to cuts and pinch flats. |
 |
| One thing I also noticed was no direction arrow, so I presume the Gravelking can fit any way round. |
 |
| Panaracer. |

Gravelkings have a AX-a....... Which means AX technology uses extremely narrow cord which is weaved at a super high density into the casing for lightness and flexibility, so the increase density improves resistance to cuts and abrasions, how do I know this I hear you all asking, its very simple, I found the Panaracer Technology website that list every special feature of the entire Panaracer bicycle tires!
Check this link out: https://www.panaracer.com/products/technology.html
https://www.panaracer.com/company/
FITTING OF Gravelking’s.
With my bike clamped in a bike maintenance stand,
First thing I had to do was remove the old tyres from my bike, I removed the wheel from the frame, if you have Hydraulic brakes I recommend using a brake spacer in between the brake pads once the wheel is off your bike, doing this could save you a lot of agrovation if you mistakenly pull on the brake lever!
I Can recommend the company called Total Bleed Solutions, link below for the brake spacers.


 Time to pump the Gravelking back up with the hand pump.

I put 50 PSI in the as a test, Panaracer say you could go to 60PSI!.

Plenty of grip.

Plenty of clearance.


I will add the “How to Fit” part of the review because I feel a lot of cyclists are not too sure on how easy it is to fit a Tubeless tyre, my review here is for a Direct Replacement of the Gravelking Tubeless Tyres, there are ways and means of converting a tubed wheel to a tubeless system but I have not covered that here, it’s a straight off with the old, and on with the new, I will be using Stans No More Tubes sealant as that is the make I have, but you can find any tubeless sealant at your local bike shop or online.
If in any doubt seek advice, online, or your Freindly bike group, or even your local bike shop that may stock all you need.
Feel free to skip to the “Test Ride” part of my review below.With my bike clamped in a bike maintenance stand,
First thing I had to do was remove the old tyres from my bike, I removed the wheel from the frame, if you have Hydraulic brakes I recommend using a brake spacer in between the brake pads once the wheel is off your bike, doing this could save you a lot of agrovation if you mistakenly pull on the brake lever!
I Can recommend the company called Total Bleed Solutions, link below for the brake spacers.
 |
| Dust cap removed, release the air! |

On my old Crosscut tyres I noticed that the Stans tyre sealant I have in the tyres to protect for punctures, this was weeping out of the side walls of the tyres, I have yet to find out why this is happening.
Waiting for a reply on Instagram.
Waiting for a reply on Instagram.

You will need tyre levers to remove one side, check to see if you still have any sealant in the tyre, if that’s the case, find something to syringe the sealant out with, and if possible keep it to refill the Gravelking when fitted.
 |
| Stans tyre sealant. |
 |
| Syringe used to refill the bottle. |

I kept the Stans No Tubes Tire Sealant that was in the front wheel, but the rear one was too low, I refilled two of the refillable tubes.
 |
| Wipe the rim with a cloth removing any build up of the Stans sealant. |
 |
All ready to accept the new Panaracer Gravelking tyre.
|
 |
I took the Gravelking tyre out of the card they come in, and I just cleaned up the edges of the the tyre and hanged it up on a hook to get the round shape back.
|
 |
| On the name printed on the side of the Gravelkings there is a clear protection strip across the name, luckily enough I noticed it, so remove it before fitting as the strip could get in the way of installation. |
 |
| Good side wall on the Panaracer Gravelking SK, real protection from any cuts and rips. ZSG - Zero Slip Grip, the rubber compound offers enhanced wear resistant, this will give you impact and puncture with sidewall protection. |
 |
| Place the tyre on the rim and feed it all the way round the rim, you should be able to pop on the last bit by hand, but if you find it a bit tough, simply get your tyre lever and pop it on. |
 |
| Flip the wheel over and feed the other side onto the rim. |
 |
| 700 X 43C Tyre size. |
 |
Notice the line around the edge of the tyre, this is the guidance line and it needs to be a continued space on the edge of the rim all the way round the rim.
|
 |
| Once the tyre is on refit the valve. |
 |
| Nip up the valve with a valve removal tool. |
 |
| Time to inflate, was it possible to do it with a typical hand pump, I’m afraid not, I did try it for the sake of the review but got nowhere near to popping the side beads on the Gravel king SK. |
 |
| Next idea was to use the car tyre pump most of us now have in the boot of the car, I had a Presta Adaptor some where, but as usual trying to find something that small was a impossible task, as it was not where I thought I had put it in my bag of bike bits and bobs, so off I went to my local bike shop Lea Valley Cycles in the Stow, to buy another one, lucky enough Dave the shop owner had one in store, and I did not have to wait too long to be served, all good on the Social distancing. |
 |
Fit the adapter to the valve making sure the valve is open.
|
 |
| Plug your compressor in to the power socket of the car and attach the valve to the valve of the Gravelking and wait for the tyre to pop on the rim. And wait... And wait... |
 |
| I found the pump was not powerful enough to pop the tyre bead on the rim, air was leaking top middle bottom! Next step was to visit Stow Tyres in the Stow, Harlow. |
That way did not work.
The recommend installation is to use a Shock Pump, but to be honest unless your a "money no object" kind of cyclist it could work out to be expensive. The shock pumps come in a range of Styles and makes, some have a digital pressure gauge, others have analogue, the price varies for a small backpack size model or a work shop model, the list is a big one depending on your requirements, price can be around the £16.00 to £70.00 range.
To get the tyre to seal on the rim, it is the same as a car tyre, the bead of the tyre needs to be blown onto the rim quicker than air is able to escape the rim, you can also find that a Track pump that can be preloaded with air will do the job fine, these also can range from £39.00 to £70.00 depending on make etc, so its could work out expensive.
There has to be a cheaper way to get the tyre on, one way is make a Shock pump, (YouTube is very handy for ideas) a large Lemonade bottle is one way, or a Garden Pressure Sprayer is another idea, but the easiest thing for me is to take the wheel down to my local Tyre Shop at the Stow, there is a tyre company called Stow Tyres, so I introduced myself and ask for there help getting my tyres on the rims.
 |
| Really helpful Stow Tyres. |
 |
| The Stow tyre fitter fitted the Presta adapter, but found it did not fit there tyre gauge, no problem, he simply removed the valve and filled the tyre with air, once the nice sounding pop was heard, it was off with the tyre gauge and finger over the hole until I put the valve back in and tightened the valve, successfully the Gravelkings were on the rims! Result! |
 |
| One Panaracer Gravelking SK tyre on the rim.
Once I got home from Stow Tyres it was time to just put the wheels to one side and have a cup of Coffee, my thinking was I’ll leave the wheels for a hour to see if they lost any pressure, I noticed that one was slowly losing pressure, nothing to worry about I just pumped the tyre up more and had another cup of Coffee and waited a while longer.
|
After the hour I was happy that the tyres had sealed onto the rims ok, no loss of pressure and the guide lines were all seating right on both wheels, now to re add the Stans No Tubes Tire Sealant to the wheels.
|
| Release the air and remove the valve. |
 |
| Refill the Gravelking with the tyre sealant, I’m using Stans No More Tubes sealant, recommendation for filling is 3 fluid Ounces . |
 |
| Place valve at the 6 O’clock position and gently squeeze your tyre sealant in the valve hole. |
 |
| Make sure the valve stem is clear of liquid. |
 | |
|
|

 |
| Valve back in place and tightened. |

 |
| With the valve closed and any sealant wiped away, the wheel needs a little bounce around on the ground to evenly spread the sealant around the inner tyre. |

I put 50 PSI in the as a test, Panaracer say you could go to 60PSI!.
 |
| Looks so nice on the wheel. |

Plenty of grip.
 |
| The Panarcer Gravelking set off the wheels and bike very nicely. |

Plenty of clearance.
 |
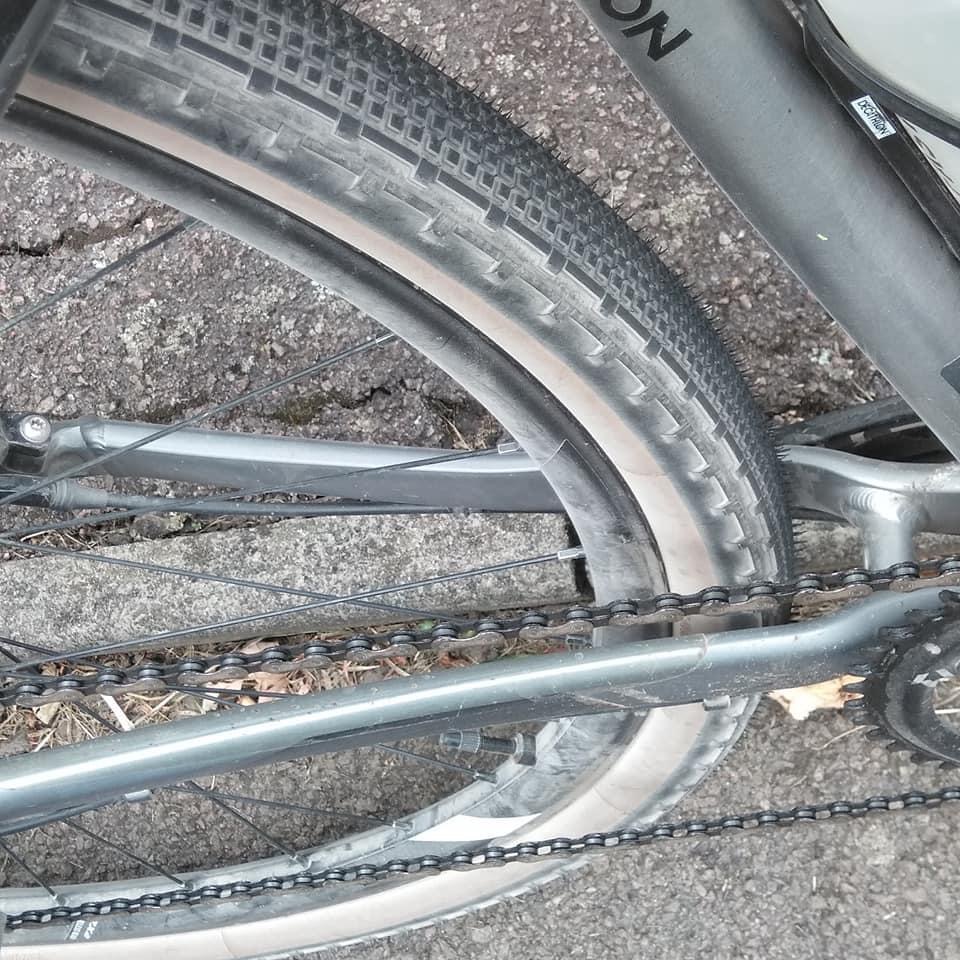
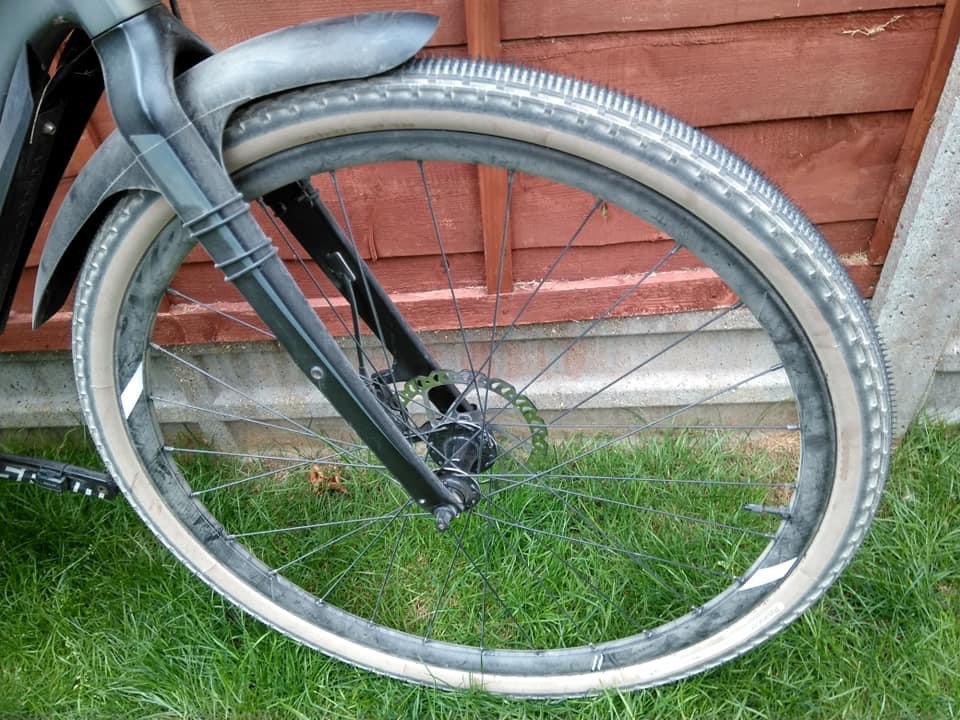
| Wheel refitted to the bike, stand back and admire! I like the look of the side wall and the tyre gives the Giant a bit more street card I think, a stand out from the crowd bike now. |


 |
| Front tyre on, the Gravelhugger mudguard can be moved up and down to allow for clearance. Looks very smart. |


Once the Gravelking tyres were refitted to the bike I decided to put it away and plan for the test ride the next day, I was so confident that the Gravelking SK were going to stay up a ride was planned for the morning at 09.00!
Test Ride. Test Ride. Test Ride.Test Ride.
The Adventure Ride was mapped out on the Komoot mapping system, I included more or less every kind of surface apart from mud, as the dry weather conditions make it impossible to find any mud trails. (At the time of the ride)
On getting the bike out for the ride the next day and checking the Gravelking SK’s I found the pressure gauge was at the same pressure as I had put in the previous day, so I was confident the tyres were 100% sealed to the rim as they should be, not as hard a job as I thought it might be.

Start out from the Morhen Public House in Harlow.

Nice and Brand New looking!
 |
| Dusty Gravel trail, sharp stones etc. |

 |
| The Panarcer Gravelking made easy work on any kind of track, they never once gave way Or even felt like they could not handle the tracks I was going on. |
 |
| A great day for a ride out to test the Gravelking’s gravel bike tyres. |
 |
| Nothing fazed the Gravelking’s. Over nettles, stones, rocks, across fields, in the woods, no punctures on the ride at all. |
 |
| Gilston. |
 |
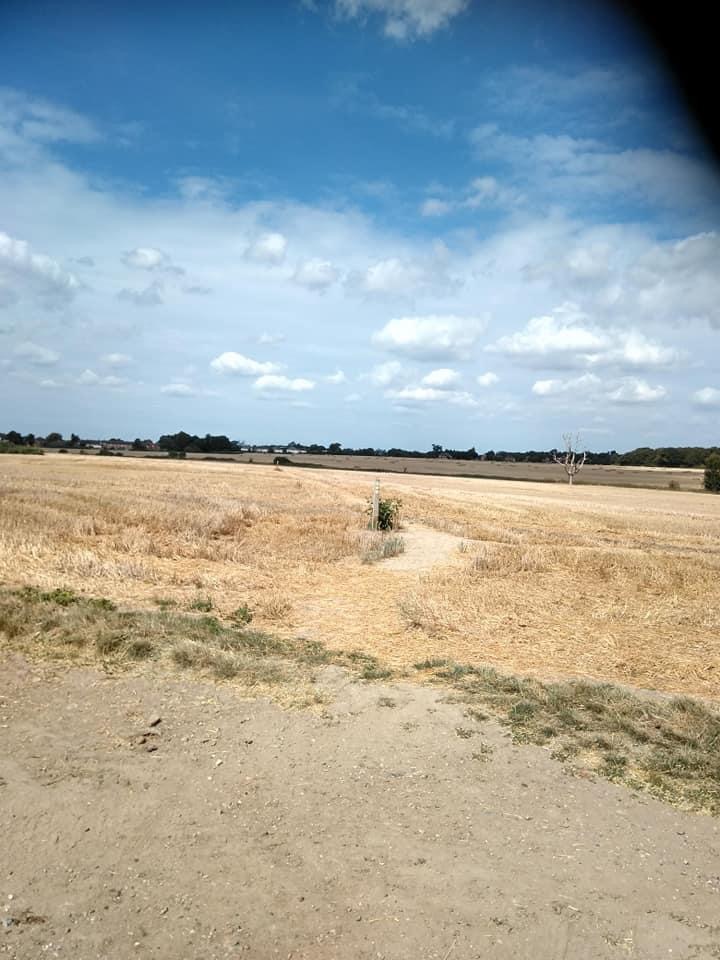
| Corn field with lot and lots of sharp edges sticking out of the ground. |
 |
| Stony, small and large stones, dusty surface. |
 |
| Yes there was a path in there, not a good one, but the gravel bike made easy work of it. |
 |
| Ride was totally in dry conditions, dust was everywhere on my new Gravelking tyres, my frame, all except the chain drive! (See my Revolubes Chain Lube review) |
 |
| Over a wooden bridge and the ride took us across another ploughed field. |
 |
| Fantastic Views. |
 |
| At the time of the ride very dusty paths. |
 |
| On inspection of the tyres, apart from the dust and odd small stone caught in the tree, there was nothing to worry about, in the past I have ridden part of today’s trail and I’ve seen the Stans Tyre sealant sealing up small “P” holes. |


 |
| End of the ride. It was mostly road from here on, a chance to see how well the Gravelking tyres rolled. on tarmac. |
On the road the Gravelkings were rolling fast, it felt a lot faster on previous rides, cornering at speed felt safe, nothing seemed to faze the tyres at all, the ride to me out in the fields and trail and on the road was on big Grin factor! I’m hooked on these Gravelkings, Can’t see anything else taking them over on the Grin factor, Speed and Grip, top marks....
 |
| Fast rolling. |
 |
| Looking good all covered in dust! |


On a road section from Stansted Abbott’s to Roydon railway station there is a nice down hill section, the ride down on the Panaracer Gravelking felt like it was the fastest I had ever been down this section of road. So I’ll find it on Strava, and guess what, it’s not there, for some reason I can’t find the ride and the P.B’s, but I’m convinced it was the fastest I had been down that section, so on the road it feels fast rolling And plenty grip.
Really annoyed about the upload to Garmin, it was around the time the problems started with the Garmin system. As they say, “if it not on Strava it didn’t happen!”
Thank you to Panaracer for the chance to review there Gravelking SK Gravelbike tyres, really looking forward to the adventure I will have on the bike, lots of photos and stories to come as the nights start to draw in.
Thank you to ZyrFisher for getting them out to me.
Contact Details.
Panaracer Twitter : https://panaracer.com/
Website: https://www.panaracer.com/
Instagram : www.instagram.com%2Fpanaracer_world
Facebook Feed: www.facebook.com%2FPanaracer
Zyrofisher Facebook : www.zyrofisher.co.uk
Zyrofisher Website: http://www.zyrofisher.co.uk/
Stow Tyres: https://stow-tyres.com/contact-us/
Stans Sealant: https://www.notubes.com/shop/tubeless/sealant


Update: Sunday 6th September 2020.
Went on a lovely group ride toHatfield Forest yesterday (Saturday) Sun was out, the birds were chirping!
When the group arrived at Hatfield Forest there are a few cattle grids on the road to stop the cattle getting out and wondering off down the road to the local village! I found absolutely fantastic test for the Panaracer Gravelking SK’s and that involves the cattle grids of the country side, my test for you is very easy, grab that gravel bike you have, go and find your nearest cattle grid and ride over it! Do it loads of times, see how your teeth rattle, the bike frame vibrates and feel the buzz through the handle bars. Take a good note of it, the pop home with a new set of Panaracer Gravelking SK tyres and fit them to your bike, ride back to the cattle grid and feel the difference!
Hand on heart here, it felt like a completely different gravel bike, the SK’s soaked up so much vibration and passed over the cattle grid easier, and faster!
Update: 08/09/2020
A ride out to the famous Epping Forest was the plan for today’s ride out, for those who do not know about Epping Forest, it is a 2400-hectares (5900-acre) area of ancient woodland between Epping in Essex and Forest Gate in Greater London to the south straddling the boarder between London and Essex, it is a former royal forest, and it’s now managed by the City of London Corporation.
The forest is approximately 19 kilometres (12 mi) long in the north-south direction, but no more than 4 kilometres (2.5 mi) from east to west at its widest point, and in most places considerably narrower. It lies on a ridge between the valleys of the rivers Lea and Roding, It contains areas of woodland, grassland, heath, rivers, bogs and ponds, and its elevation and thin gravelly soil (the result of glaciation) historically made it unsuitable for agriculture.
The Forest makes it a haven for cycling around the woods off the track that weave up and down the woods, sections of path cross roads to link up other parts of the Forest, it’s easy to get lost, go for a ride one week, and then try to find the same route, chances are you will have trouble riding the same route without it logged on your Garmin!

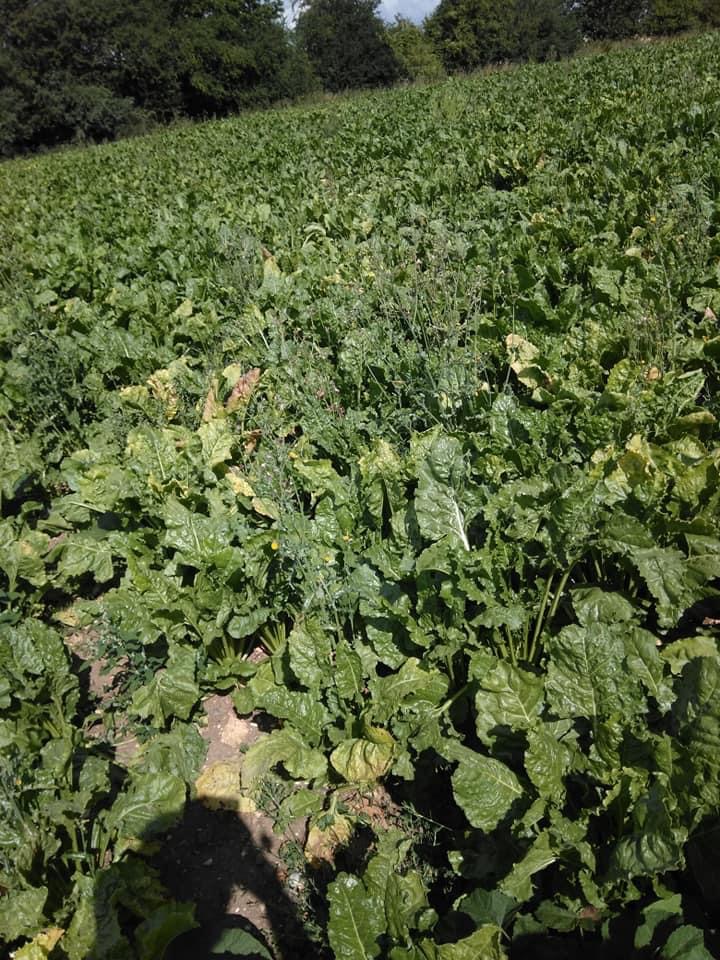
A cross section of riding was to be had, various surfaces from long grass to mud, and gravel in the middle.


The Gravelking’s felt great, on down hill sections I found I was going a bit faster than I would have done on the previous set of tyres, and at a safer feeling ride.


Tremendous grip.


By the-time I was back on the gras the tread started to clear it self.

A great ride out around the forest and fields, the more I ride with the Panarcer Gravelking SK’s the more I do not want to remove them from the wheels!
UPDATE; 20/09/2020


So far (fingers crossed) no “P-Word” has happened, the SK’s have started to lose there little bits of excess rubber on the tread, Grip is still as good as ever, and still finding PB’s on Strava, tyre pressure has been good, no loss of air when the bike has been left for a while, so all in all still very impressed with the Panaracer Gravelking SK gravel tyre.
UPDATE 01/04/2021.
A quick update for you all on the Panarcer Gravelking, so far (touch wood) still have not had a single “P” in either tyre, tread very good still, showing no signs of wear..
UPDATE 28/04/2021
I had a little mishap on a ride back from a meet up with the London Gravel Bike Club owner, I felt the rear wheel going soft, I stopped to pump it up and broke the valve! Story is on the Stans No Tubes review, link here..
Update 22/05/2021
Here I am to give you the latest news on the Panarcer Gravelking tyre, I’ve now changed the tyre sealant from the Stans to a make called Peaty’s, (see my Peaty’s review) and now I should be all protected from the horrible puncture demon,, right..... Well no, after a ride I noticed the sealant was escaping so knowing what I do now a proper investigation was needed, I found a Very small hole on the edge of a Noble bit, and for some reason the Peatys would not seal it, basically that only left me with one choice, and that was to seal the hole with a tire plug, with is how I managed to get it to seal.
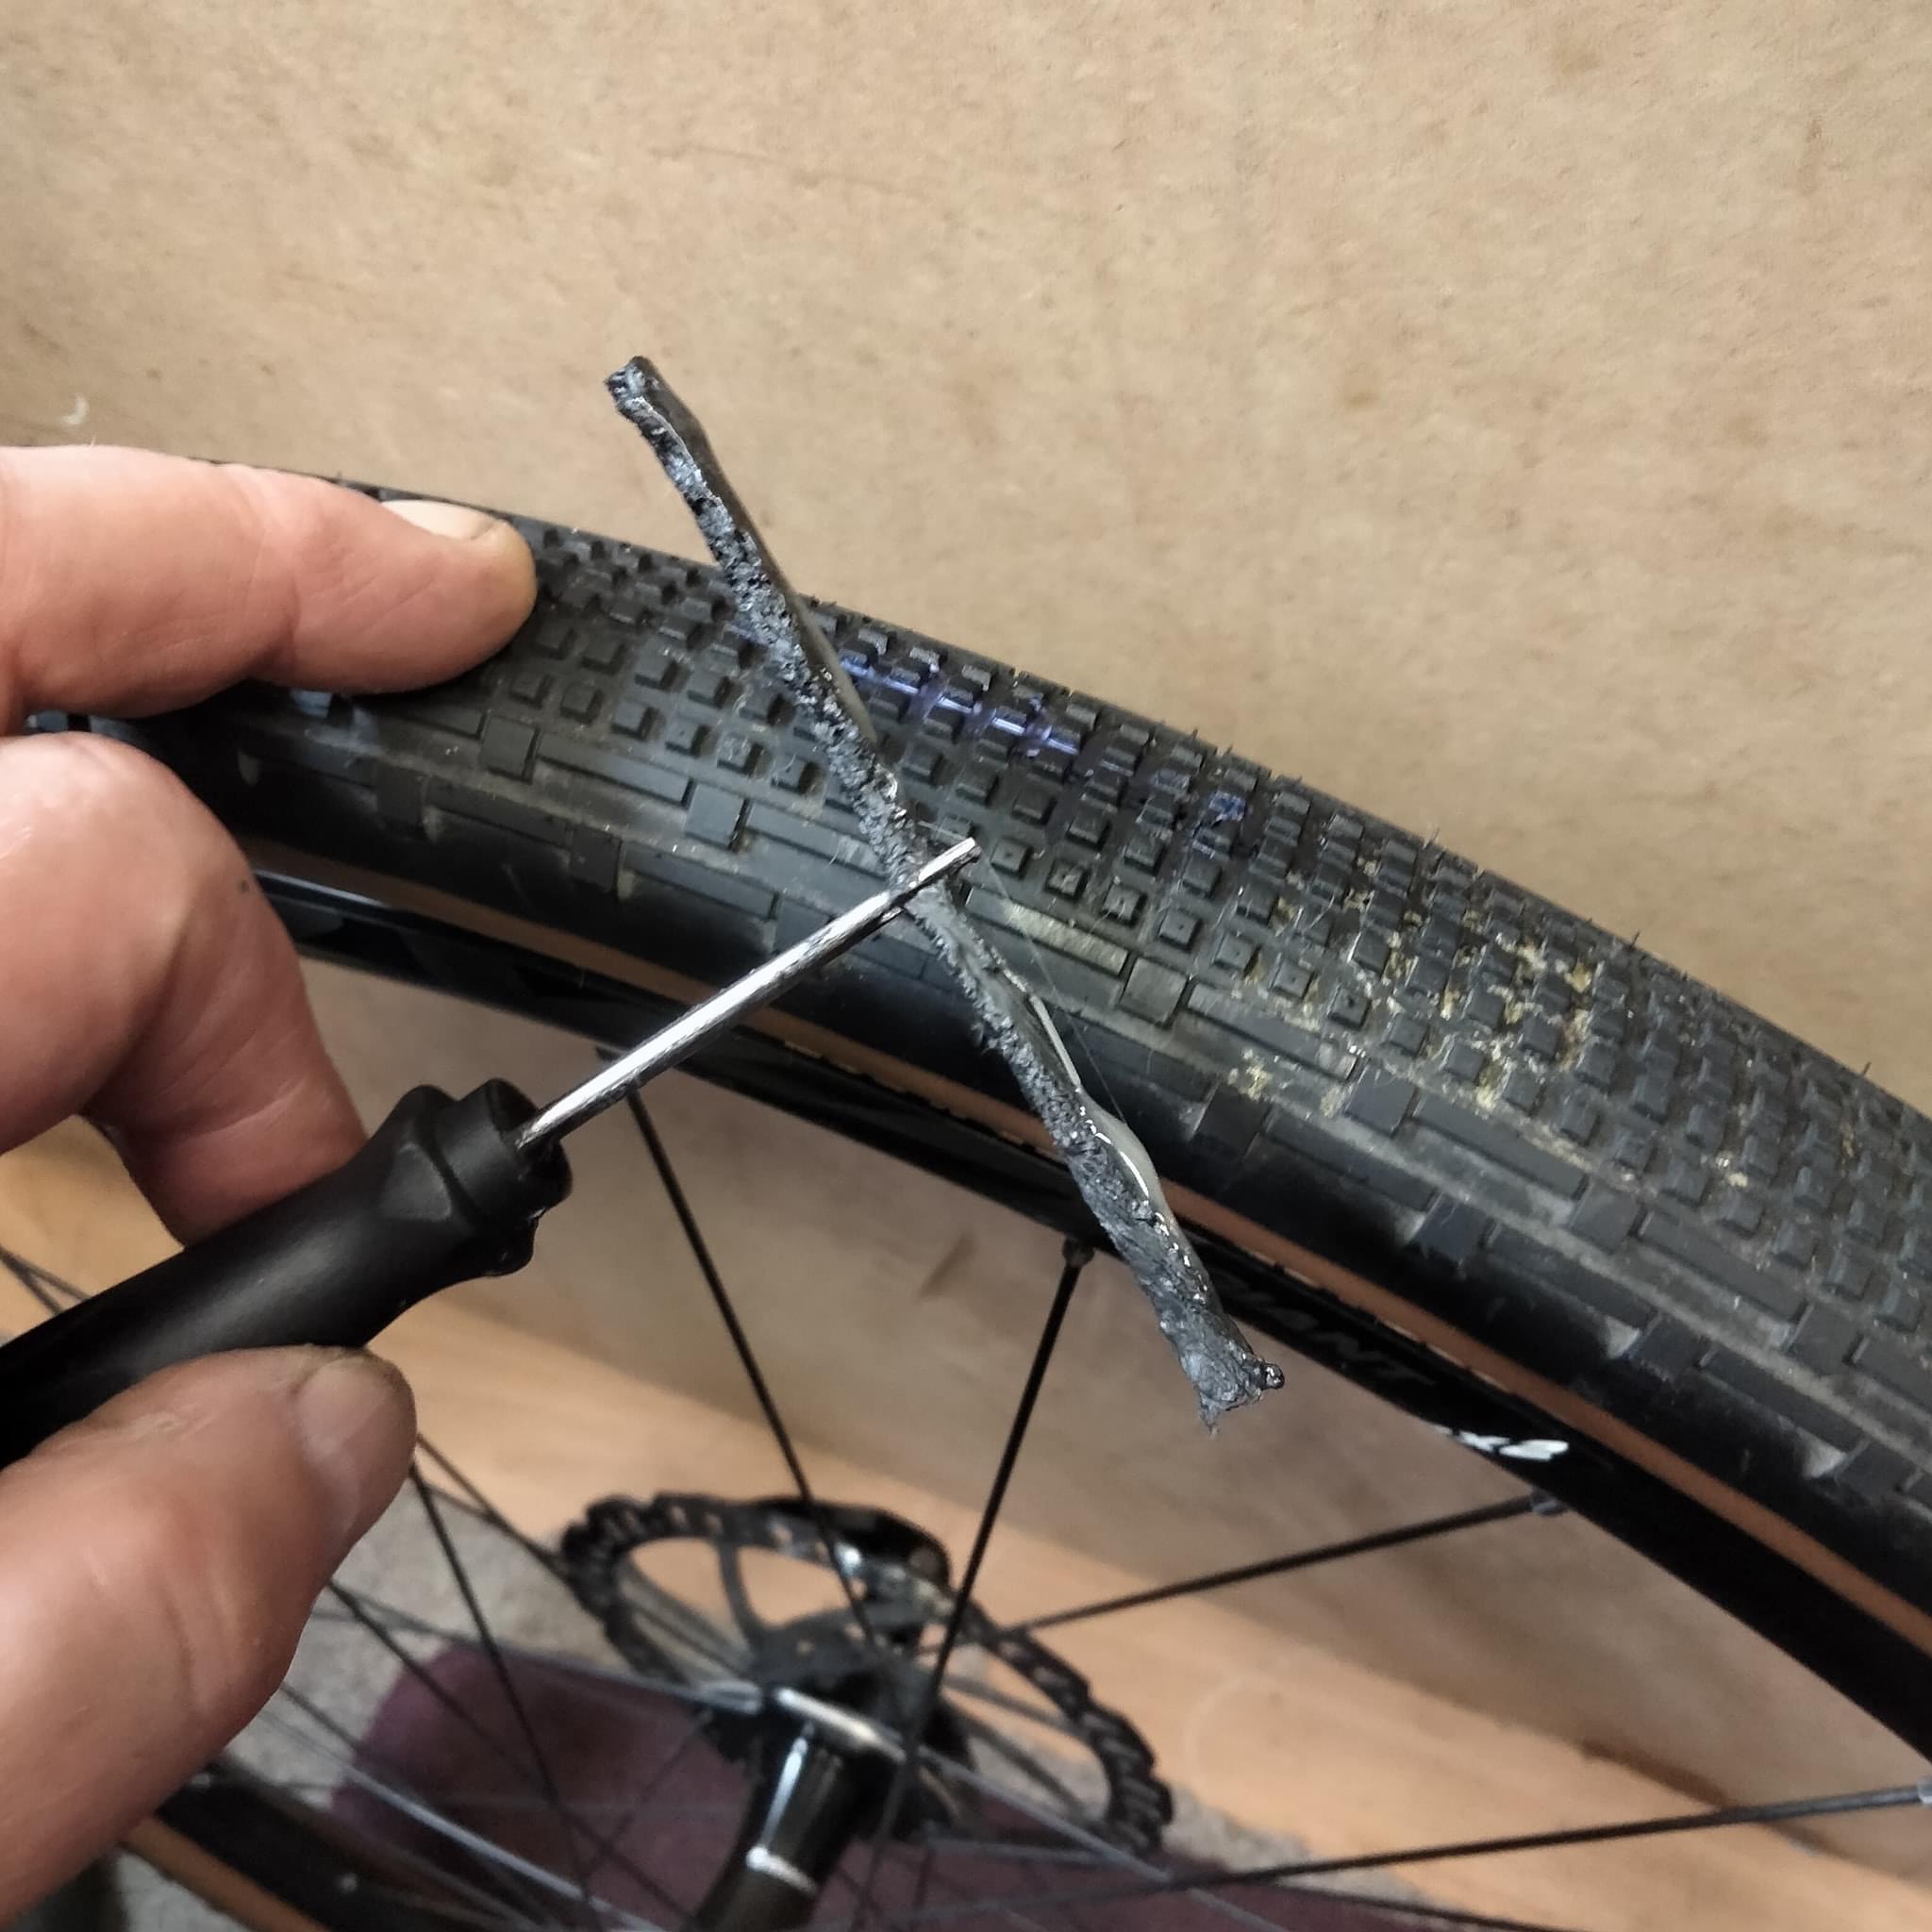 |
| Giant Tire Plug. |
 |
| Hole is through the Noble. |
 |
| Tire Plug in the hole. |
 |
| Giant Tire Plug kit. |
Once I had the Giant Tire plug in the hole the Peaty’s sealant worked, only problem now is the recommendation of changing the tyre as soon as I can, I’m going to leave the Panarcer Gravelking on the bike, see how well and long it lasts for, I’m very surprised that the Gravel Kings having a hole in the Nobles area , they have been really good fast tyres, I’ve really raved about them to you all out on the rides, maybe it’s as the saying goes, “It’s Sod’s Law”! Maybe it will teach me to keep my mouth shut in future!
Bike is back up and working now..
I’m on the hunt for the “Holy Grail” of Gravel Bike Tires! And when I find them, You will be the first to know!
UPDATE 06/06/2021.
UPDATE: 29/01/2021
New Gravelking tires being sent out soon.
Fitted The New replacements along with the TY Bike Yogurt Tubeless Tire sealant, and what a difference it makes!
No trouble what so ever once the new Gravelking was fitted, a Brilliant Gravel Bike Tire!
Please Feel Free to Support Our Sponsors Adverts.
Thank You.
Foot Note This is not a Paid Advertisement for Panaracer Tyres.
Harlow cycle page on Facebook:
https://www.facebook.com/Harlow-Cycle-Page-805601672891539/
YouTube: https://www.youtube.com/channel/UCBlXmH7f4X0Az_xr7Az0Yqg
Instgram: https://www.instagram.com/harlowcycle/
Tumbler : http://harlowcycle.tumblr.com/
Twitter Feed: @TDF79
Linkedin: https://www.linkedin.com/in/harlow-cycling-b785a1105/
Pinterest: https://www.pinterest.co.uk/Harlowcycle/pins/
Email: HarlowCyclingPageGroup@Hotmail.com
....................................................................................................................


No comments:
Post a Comment
Please do leave a comment